

Image SEO: Optimizing images for search engines

Whether you’re writing a new blog post or working on your product pages, chances are you’ll find yourself asking whether your page needs an image. The answer is always “Yes”. Images bring a page to life and contribute to your website’s SEO. But don’t worry; we’ll help you figure out where to find the right image and optimize it for SEO in no time. Let’s get started!
Key takeaways
- Images enhance your website’s appeal and boost SEO by helping search engines understand content better.
- Optimize images by using high-quality visuals, descriptive file names, and appropriate formats like WebP or AVIF.
- Include alt text for accessibility and SEO, but avoid keyword stuffing; it should accurately describe the image’s content.
- Utilize structured data for images to improve visibility in AI-driven search results and image searches.
- Implement responsive images, reduce file sizes, and consider using an image CDN to improve loading speeds and performance.
On optimizing your images
Images do more than make your content look good. They help search engines understand your pages, improve your chances of being discovered, and can even bring traffic from visual search.
This guide covers everything you need to optimize your images for SEO. You’ll find practical tips on choosing the right formats, writing alt text that works, and using structured data effectively. Follow these steps, and your images will start performing a lot better.
Always use images
Images, when used correctly, will help readers better understand your article. Or get a better idea of the product or service you’re offering. The old saying, “A picture is worth a thousand words” probably doesn’t apply to Google, but it’s true when you need to spice up 1,000 dull words, illustrate what you mean in a chart, or make your social media posts more enticing.
It’s a simple recommendation: add images to every article you write or page you create to make them more appealing. Moreover, with the search landscape rapidly changing and not just relying on text anymore, adding visuals to your pages could improve the performance of those pages.
Visual search is part of the equation, as was already apparent in Google’s vision for the future of search a few years ago. But with AI and other multimedia developments on the rise, optimizing your images (and videos, for that matter) makes it easier for search engines and people to find you. Pages with unique, high-quality images see better scroll depth, meaning users engage more and stay longer.
Google Lens handles over 20 billion searches every month. Not optimizing your images for visual search, means you’re missing a huge opportunity to attract this traffic.
Google Images
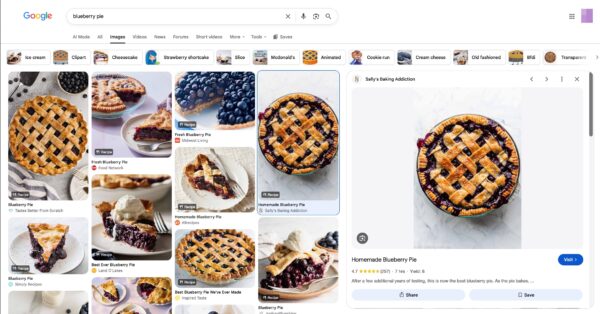
Google Images helps people find visual content across the web. It displays images and organizes them by relevance, quality, and context. When you search, it shows thumbnails, but clicking an image can take you to the webpage where it’s hosted. For site owners, Google Images can be a serious source of traffic, as optimized images can rank here and bring visitors to your site. It also supports reverse image searches, letting users find similar images or locate where an image appears online.
Google Lens
Google Lens lets you search the world around you using just an image. Point your camera at an object, landmark, or product, and it identifies it, finds similar items, or even translating text in real time. For businesses, this means your images can drive traffic if they’re optimized right. Image SEO for Google Lens works by ensuring your images are high-quality, unique, and properly described with alt text and structured data. This helps Google understand the context of your images, making them more likely to appear in visual search results. Original, detailed images with clear metadata perform best, so avoid generic stock photos and focus on visuals that truly represent your content.

Getting your images in AI search results
AI search results, like Google’s AI Overviews and AI Mode, are changing how people find information. These systems use images to answer questions, so optimizing your visuals can help them appear in AI-generated responses.
The good news is that most image SEO best practices also apply to AI search. Clear, descriptive alt text helps AI understand your images, just as it helps screen readers. Structured data like ImageObject gives AI systems additional context to interpret and reference your visuals. High-quality, original images also perform better, just like they do in traditional search.
For the best results, focus on the same tactics you use for image SEO. Use detailed alt text, provide structured data, and ensure your images are high-quality and relevant. Also, make sure your images are indexed in Google Images, as AI systems often pull from this database.
Check Google Search Console to see how your images perform. If your images are already optimized for SEO, you’re likely already prepared for AI search. Just keep refining these practices as AI continues to evolve.
Finding the right image

It’s always better to use original images, like high-quality photos you have taken, than stock photos. Your team page needs pictures of your actual team, not this man on the right or one of his other stock photo friends.
Your article needs an image relevant to its subject. If you’re adding a random photo just to get a green bullet in the Yoast SEO content analysis, you’re doing it wrong. The image should reflect the post’s topic or have illustrative purposes within the article. Also, try to place the image near the relevant text. If you have a central image or an image you’re trying to rank, try to keep that near the top of the page if possible without feeling forced. There is a simple image SEO reason for all of this, because an image with related text ranks better for the keyword it is optimized for. We’ll go into image SEO later on in this article.
Alternatives
Don’t have any original images you can use on your website? There are other ways to find unique images. Flickr: Creative Commons and Unsplash are great image sources, for instance, as you can use Creative Commons images. Remember to check out the restrictions and attribute the original photographer when you use one of their images. Our blog post gives you an overview of where to get great images.
Steer clear of obvious stock photos, but if you insist on using these, pick the ones that look more genuine. Whatever you use, you’ll probably find that images with people in them tend to look like stock photos. Unless you took the photos yourself, which, in our opinion, is always the best idea.
Apparent alternatives for photos are illustrations or graphs. Also, an honorable mention should go to animated GIFs, which are prevalent today.

Even though animated GIFs are popular, don’t overdo it. It’ll make your post more challenging to read, as the movement of the image distracts your readers’ attention. Also, not unimportant and good to mention is that they can slow down your page as the filesize can be huge.
Preparing images for use in your article
Once you’ve found the right image, like a photo, an illustration, or a chart, the next step is optimizing it for your website. Before you add your image, there are a few things you need to think about:
Choose the right file name
Image SEO starts with the file name. You would like Google to know what the image is about without even looking at it. So, use your focus keyphrase in the image file name. It’s simple: if you’re writing an article on the Notre Dame and use an image showing a sunrise in Paris over the Notre Dame Cathedral, the file name shouldn’t be DSC4536.jpg. A proper file name would be notre-dame-paris-sunrise.jpg. That way, the photo’s main subject (and perhaps your article) is at the beginning of the file name.
Choose the right format
For images, the right format doesn’t exist. It depends on the kind of image and how you want to use it. In short, we recommend to:
- Choose WebP for larger photos or illustrations. It will give you good results in terms of colors and clarity with a small file size;
- use PNG if you want to preserve background transparency in your image;
- or use AVIF, as it will produce high-quality results with even smaller file sizes. In this case, you do need a WebP or JPEG fallback for browsers that don’t support the AVIF format. You can use tools like Squoosh to convert your image into the format you need.
- use SVG for logos and icons. With the help of CSS or JavaScript, you can manage images in SVG format. For instance, resize them without loss of quality.
If you know a large part of your audience uses specific browsers or devices, check whether those browsers on CanIuse.com support your preferred format. When you’ve chosen the correct name and format, it’s time to resize and optimize your image!
Scale for image SEO
Loading times are essential for user experience and SEO overall. The faster the site, the easier for users and search engines to visit a page. Images significantly impact loading times, especially when you upload a huge image to display it small, for example, a 2500×1500 pixel image displayed at 250×150 pixels size.
Even if it is displayed a lot smaller, the entire image still has to be loaded. So, resize the image to the size you want to display it. WordPress helps you do this by automatically providing images in multiple sizes after uploading them. Unfortunately, that doesn’t mean the file size is also optimized; that’s just the image display size. So think about the size in which you upload your images.
Use responsive images
Responsive images are essential for SEO. If you’re using WordPress, it’s done automatically by default. Images should have the srcset attribute, which makes it possible to serve a different image per screen width, is especially useful for mobile devices.
Reduce file size
The next step in image SEO is to ensure your scaled image is compressed. That way, it’s served in the smallest file size possible. It is good to know that WordPress does compress the images you upload, but, unfortunately, this automatic compression often isn’t enough to rely on it alone.
Of course, you could export the image and experiment with quality percentages. But we prefer to use the highest possible quality images, especially given the popularity of high-resolution screens in mobile and desktop devices.
You can still reduce the file size of these images by removing the EXIF data, for example. We recommend using tools like ImageOptim or websites like Squoosh, JPEGmini, jpeg.io or Kraken.io.
When you’ve optimized your images, you can test your page with tools like Google PageSpeed Insights, WebPageTest.org or Pingdom.
Improve LCP in Core Web Vitals
Specifying width and height for images in CSS can significantly improve your website’s user experience and overall performance. By setting explicit dimensions for your images, you can optimize the layout and prevent content from shifting while the images load. This practice is essential for improving Core Web Vitals, including Largest Contentful Paint (LCP).
When you define the width and height properties for images in CSS, the browser can allocate the required space for the image before it is fully loaded. This allows the browser to render the content more accurately and avoids unexpected layout shifts, which can be incredibly frustrating for users.
Here are some important benefits of doing this:
- Prevents layout shifts: By setting the exact dimensions of images, you reserve the appropriate space for them. This ensures that other content on the page doesn’t shift or jump around when the images load. Users can start consuming the content without distractions, leading to a better user experience.
- Improves page loading speed: When the browser knows the dimensions of an image in advance, it can allocate space for it while other page elements continue to load. This helps to optimize the page loading speed, particularly the LCP metric, as the largest contentful element’s space is reserved from the start.
- Optimizes browser rendering: Knowing the image dimensions allows the browser to perform better in rendering and painting. It can allocate resources efficiently and optimize the rendering pipeline, resulting in a smoother and faster browsing experience.
To specify width and height you can use either inline styles or external stylesheets for images in CSS. Here’s an example:
img {
  width: 500px; /* Set the desired width */
  height: 300px; /* Set the desired height */
}
Instead of using fixed pixel values, you can use relative units like percentages or viewport-based units (e.g., vw, vh) to make the image responsive and adapt to different screen sizes.
It’s important to note that specifying the dimensions in CSS only sets the image’s display size and not its actual file size. To optimize image file sizes for faster loading, consider compressing and resizing images before uploading them to your website.
Download priority
For the most important image on your page, the LCP image, add fetchpriority="high". This tells the browser to load it first, improving user experience and performance. For images that appear further down the page, add decoding="async". This lets the browser decode them in the background, so they don’t slow down the rest of your content.
By specifying these elements for your images in CSS, you improve your website’s overall performance, visual stability, and user experience. Combine this practice with other image SEO techniques, such as proper image formats, compression, and lazy loading, for maximum impact on your website’s speed and Core Web Vitals.
Adding the image to your article
While Google is improving at recognizing what’s in an image, you shouldn’t rely on their abilities yet. It all comes down to you providing the context for that image, so fill in as much as you can! We’ll discuss how below.
When your image is ready to use, don’t just throw it into your article anywhere. As mentioned earlier, adding it close to related textual content helps a lot. It makes sure the text is as relevant to the image as the image is to the text, something users and Google prefer.
Captions
The image caption is the text that accompanies the image on the page. If you look at the images in this article, it’s the text in the gray box below each one. Why are captions important for image SEO? Because people use them when scanning an article. People tend to scan headings, images and captions as they scan a web page. Way back in 1997, Jakob Nielsen wrote:
“Elements that enhance scanning include headings, large type, bold text, highlighted text, bulleted lists, graphics, captions, topic sentences, and tables of contents.”
Do you need to add captions to every image? No, because sometimes images serve other purposes. Decide whether you want to use yours for SEO as well or not. You should only add captions where it would make sense to the visitor for one to be there. Think about the visitor first, and don’t add a caption just for image SEO purposes.
alt text
The alt text (or alt tag) is added to an image, so descriptive text will be in place if the image can’t be displayed to the visitor for any reason. We can’t put it any better than Wikipedia:
“Alternative text (or alt text) is text associated with an image that serves the same purpose and conveys the same essential information as the image. In situations where the image is not available to the reader, perhaps because they have turned off images in their web browser or are using a screen reader due to a visual impairment, the alternative text ensures that no information or functionality is lost.”
The alt text is there to enhance your website’s accessibility, so be sure to add alt text to the images you use. Also, consider including the SEO keyphrase for that page if appropriate, but do not stuff the alt text of every image with keywords. Most importantly, describe what’s in the picture so search engines and people can understand it. The more relevant information surrounding an image, the more search engines deem this image important.
However, please remember that not every image needs an alt text. Instead, consider alt text as a part of your content and add it where it makes sense. For instance, if you have an image purely for decorative reasons, then that image doesn’t need an alt text. In this case, having an alt text doesn’t bring any value to your readers. On the other hand, if you use an image with a statistic, let’s say, the number of people who searched for ice cream last month, then this should be reflected in the alt text. You can find guidance for alt text in this W3’s article.

title text
Some browsers show the title text as a ‘tooltip’ when hovering over an image. Chrome shows the title text as was intended. Images’ titles are similar, and many people who use titles copy the alt text. More and more people leave them out altogether, why is that? Here’s Mozilla’s take:
“
titlehas a number of accessibility problems, mainly based around the fact that screen reader support is very unpredictable and most browsers won’t show it unless you are hovering with a mouse (so e.g. no access to keyboard users).”
Including supporting information in the main article text is better than attaching it to the image.
Read more: Read more about alt tag and title tag optimization »
Add image structured data
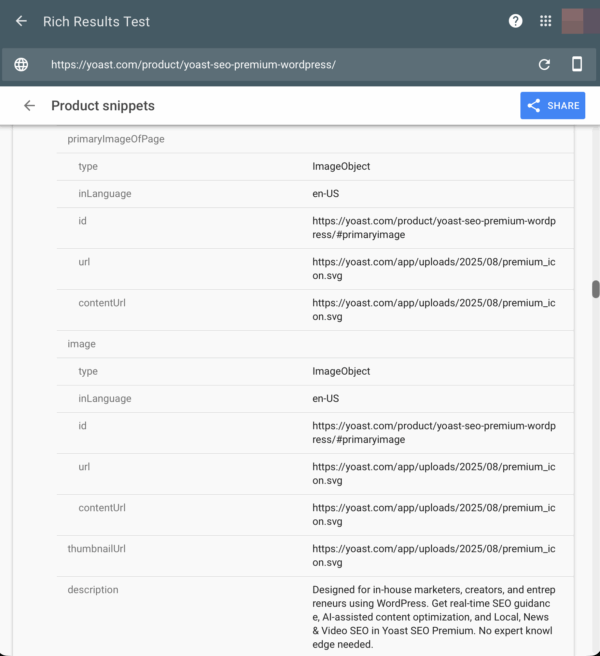
Where a bare <img> tag leaves search engines guessing, structured data makes images explicit: schema.org markup such as ImageObject, and the image property on types like Article or Product, tells search engines what an image shows and how it connects to the page. This is increasingly important now that AI-driven search experiences select and cite images programmatically.
The good news for WordPress users is that Yoast SEO handles most of this automatically: instead of outputting bare image URLs, it generates full ImageObject nodes, with captions, dimensions, and content URLs. These are all stitched together into a connected site-wide schema graph, attaching your featured image to the article schema and product images to your WooCommerce listings. Features like image licensing metadata (license and acquireLicensePage) aren’t included by default, but can be added through Yoast’s schema API filters.
Google has guidelines you need to follow if you want your images to it to understand your images. You can find them all in Google’s Structured Data General Guidelines. Read the developer documentation for Yoast’s use of ImageObject.
Want to learn more about structured data? Enroll in our free Structured data training course to learn more about adding structured data to your pages!
OpenGraph and social sharing
Earlier on, we mentioned using images for social sharing. If you add the following image tag to the <head> section in your page HTML like this:
<meta property="og:image" content="https://example.com/link-to-image.jpg" />
That will ensure the image is included in your share on Facebook or X. OpenGraph is also used for other social media platforms like Threads, Pinterest and LinkedIn. Even productivity software like Slack supports OpenGraph.
Yoast SEO has a Social media appearance section where you can set and, in the Premium version, even preview your social posts. Make sure to use a high-quality image, like the original image you used in the post, as social platforms often use higher quality/larger images.
XML image sitemaps
As a web developer, you might wonder about XML image sitemaps. We’d prefer to describe this as images in XML sitemaps. Google is clear about this:
Image sitemaps are a way of telling Google about other images on your site, especially those that we might not otherwise find (such as images your site reaches with JavaScript code). You can create a separate image sitemap or add image sitemap tags to your existing sitemap; either approach is equally fine for Google. Image sitemaps are based on generic sitemaps so the general sitemap best practices also apply to image sitemaps. We also recommend that you follow the general best practices for publishing images.
Now and then, people ask us about XML image sitemaps. We don’t generate these in our plugin but follow Google’s advice and include them in the page or post sitemaps. Just scroll down in our post sitemap and see we have added images to all our posts (there is a column just for that). Adding images to your XML sitemaps helps Google index your images, so be sure to do so for better image SEO.
Serving images via an image CDN
We all know CDNs as one of the most popular site speed optimizations. Some companies that provide CDNs also have a specific CDN for images. The image CDNs are built around basic tasks: to optimize your images and get them to your visitor as fast as possible. Running an image CDN can speed up the delivery of your images many, many times.
An image CDN lets you handle the transformation, optimization and delivery of images. You can determine what loads when and how that should work. For instance, your images can be converted on-the-fly to modern formats, and serve AVIF to browsers that support it, while falling back to WebP and then JPEG if needed, because these formats load much faster at equal or better quality.
There are many image CDNs to choose from, like Sirv, Cloudinary and Imagekit. Also, platforms like Cloudflare let you determine how to resize, reformat and serve images.
A summary of image SEO
Image SEO is the sum of a number of elements. With Google getting better at recognizing elements in images every day, it makes sense to make sure the image and its elements contribute to a good user experience as well as SEO. It would be foolish to try to kid Google.
Keep these things in mind when adding an image to an article:
- Use high-quality, unique and relevant images that matches your text
- Pick a good file name for your image
- Use modern images formats like WebP and AVIF
- Make sure image dimensions match the image size as displayed
- Use
srcsetif possible - Reduce file size for faster loading
- Specify
widthandheightfor your images - Add a caption, if appropriate, for easier scanning of the page
- Use proper image alt text. No need for a title text
- Add structured data to your images
- Add OpenGraph and Twitter Card tags for the image
- Use images in your XML sitemaps
- Serving images via a CDN
- Provide all the context you can!
Besides contributing to SEO and user experience, images can also be important in conversion. So don’t underestimate the importance of image SEO on your site!
Keep reading: WordPress SEO: The definitive guide to higher rankings for WordPress sites »
